
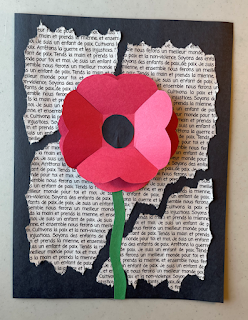
You've probably seen this type of beautiful poppy art on Pinterest or Instagram. I take you through the process step by step.
Not an "artsy" teacher? No problem! Just press play and let me quickly demonstrate it to your class for you! Click HERE to skip the reading below and just watch the YouTube Video. It’s just under 1min long from beginning to end, because we’re ALL pressed for time, aren’t we?
What you will need.
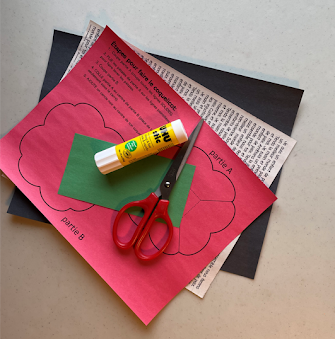
* construction paper:
> black (background and poppy center)
> red (poppy template photocopied onto red)
> grey (song lyrics photocopied onto grey)
> green (stem)
* scissors
* glue stick
* optional newsprint (instead of grey construction paper)
Step 1:
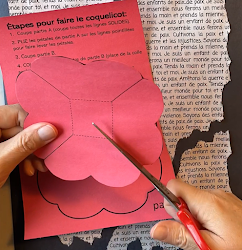
Download, print and photocopy poppy template onto red construction paper.
Step 2:
Select the lyrics to your favourite Remembrance Day song, (or just lovely messages of hope, being thankful for their sacrifice, etc…) Copy and paste, paste, paste, until it fills a page. Print and photocopy onto grey construction paper.
OR
Find newspapers with lots of writing instead. I find newspapers hard to come by around here nowadays, so I opted to print the song we’re learning for Remembrance Day this year.
Step 3:
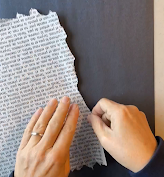
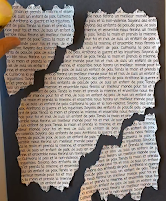
Rip the outer edge of your “newsprint” (all the way around).
PRO TIP: Make sure there are NO straight edges anywhere. Then rip the page into larger pieces. I chose to go diagonally, but kids are welcome to do whatever they like.
They should limit the number of pieces to 3-5 pieces to allow space between pieces when glueing them down.
GLUE the “newsprint” onto the black construction paper. Allow for some space between the pieces.
Step 4:
Cut the poppy pieces out and assemble (as per instructions). Once done, GLUE it onto your project.
PRO TIP: When glueing the top part of the poppy onto the lower part, turn it 45 degrees to give it more depth.
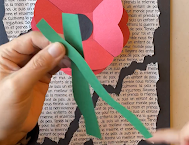
Step 5:
Cut out a slightly curved “stem” out of green paper and GLUE it onto your project starting at the very bottom of the page.


0 Comments:
Post a Comment